
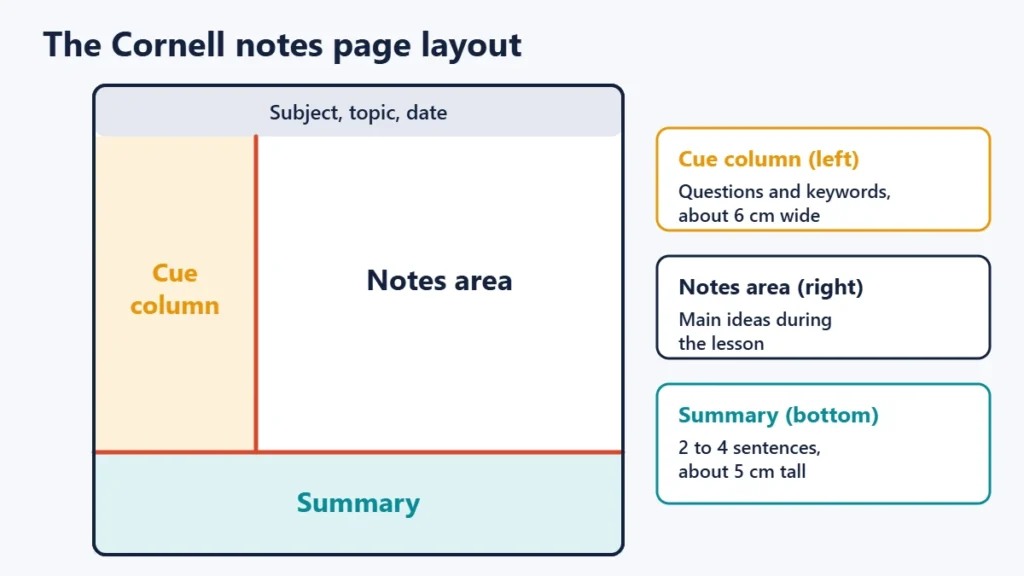
The Cornell note-taking method is a way of organising each page of notes into three parts: a narrow cue column on the left for questions and keywords, a wide notes area on the right for what you hear or read, and a summary strip at the bottom. You take notes in class, then turn them into questions, and later use those questions to test yourself. That last step is what makes Cornell notes more than just tidy notes.
This guide shows you how to set up a Cornell page, what to write in each part, the five steps for using it, a complete worked example from a school science lesson, and the mistakes that stop the method from working.
Key takeaways
- Divide the page into a cue column (left), a notes area (right) and a summary (bottom).
- During class, write only in the notes area. Fill the cue column and summary afterwards.
- Turn your notes into questions in the cue column, then cover the notes and answer them from memory.
- The method was developed by Walter Pauk, an education professor at Cornell University.
- It works for lectures, textbook chapters and online videos alike.
Who created the Cornell method?
According to Cornell University’s Learning Strategies Center, the system was originally developed by Walter Pauk, an education professor at Cornell. Pauk described it in his long-running study guide How to Study in College, which has been revised through many editions. The method spread from university lecture halls to schools around the world because it needs nothing more than a pen and a sheet of paper.
How to set up a Cornell notes page
You can draw the layout on any notebook page in under a minute:
- Draw a horizontal line about 5 cm (2 inches) from the bottom of the page. The space below is the summary.
- Draw a vertical line about 6 cm (2.5 inches) from the left edge, from the top of the page down to the summary line. The narrow left strip is the cue column.
- The large space on the right is the notes area.
- Write the subject, topic and date at the top.
These measurements are the ones usually given for Pauk’s layout, but they are only a guide. What matters is having a clear space for each of the three parts.
What goes in each section?
| Section | When you fill it | What to write |
|---|---|---|
| Notes area (right) | During the lesson or while reading | Main ideas, facts, examples, diagrams and short phrases in your own words |
| Cue column (left) | Soon after the lesson | Questions, keywords and prompts that point to each part of the notes |
| Summary (bottom) | After filling the cue column | Two to four sentences that sum up the whole page in your own words |
The key idea is that the three sections are filled at different times. If you try to write questions during the lesson, you will fall behind. If you leave the cue column empty, you end up with ordinary notes.
The five steps of the Cornell method
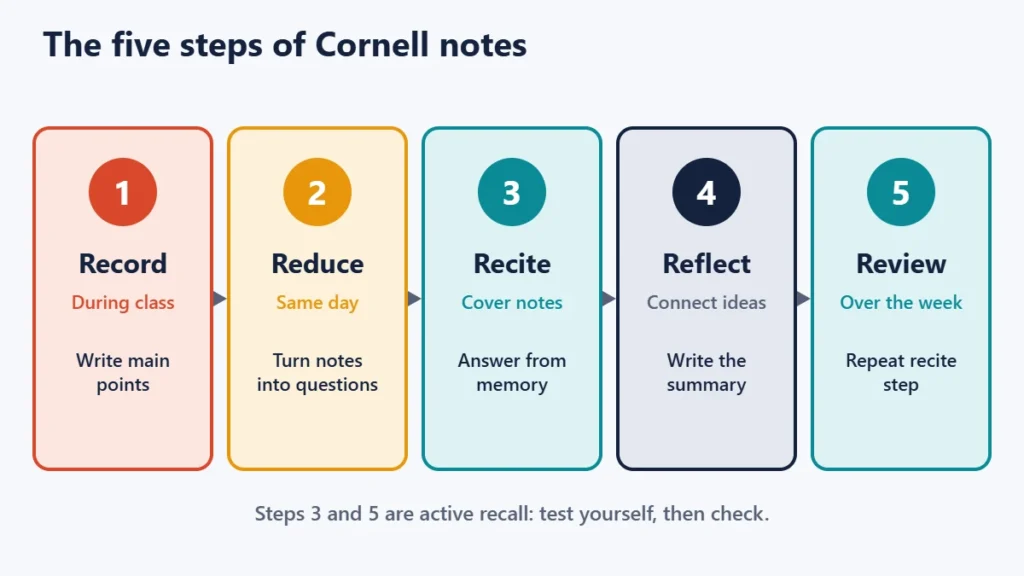
Pauk’s method is often summarised as five steps, sometimes called the five Rs:
- Record. During the lesson, write the main points in the notes area. Use short phrases, abbreviations and simple sketches. Leave a line or two between ideas so you can add things later.
- Reduce (or Question). As soon as you can after the lesson, ideally the same day, read your notes and write a question or keyword in the cue column beside each idea. “Photosynthesis needs light, water, CO2” becomes “What does photosynthesis need?”
- Recite. Cover the notes area with a sheet of paper. Look only at the cue column and answer each question aloud or in writing. Uncover the notes to check.
- Reflect. Ask how the ideas connect to each other and to what you already know. Write the summary at the bottom of the page.
- Review. Come back to the page regularly, for a few minutes at a time, and repeat the recite step using the cue column.
Steps 3 and 5 are a form of active recall, one of the best-supported study techniques in learning research. You can read more about why it works, and how to space your reviews, in our guide to active recall and spaced repetition.
Worked example: a Class 8 science lesson
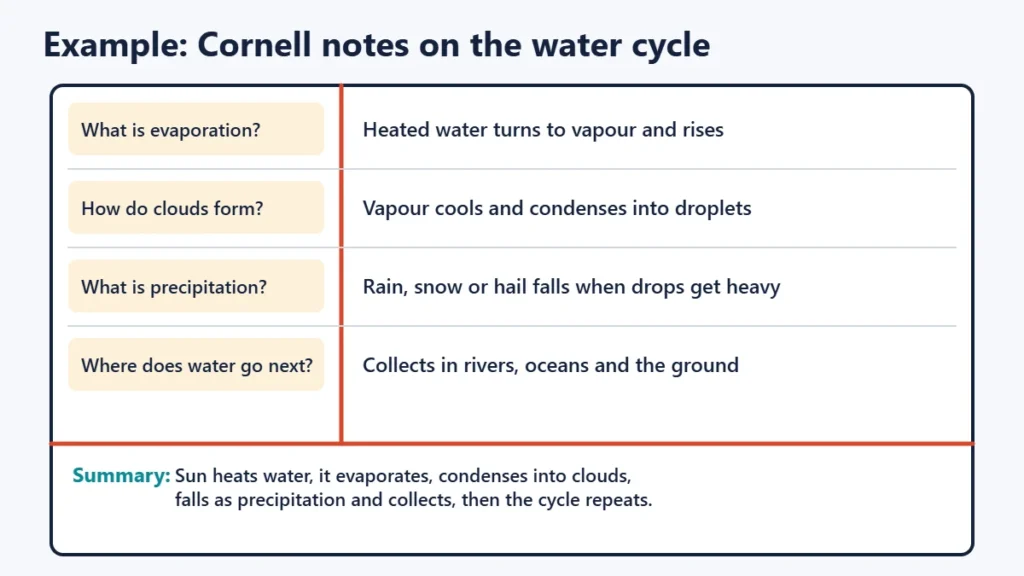
Here is what one page might look like for a lesson on the water cycle. This is an illustrative example written by The Study Cafe team.
| Cue column | Notes area |
|---|---|
| What is the water cycle? | Continuous movement of water between Earth’s surface and the atmosphere. Driven by heat from the Sun. |
| What is evaporation? | Liquid water (oceans, rivers, lakes) turns into water vapour when heated. Rises into the air. |
| What is transpiration? | Plants release water vapour through tiny pores in their leaves. |
| How do clouds form? | Condensation: water vapour cools higher up and turns into tiny droplets, which group together as clouds. |
| What is precipitation? Give 3 forms. | Water falls back to Earth when droplets get heavy: rain, snow, hail. |
| Where does the water go next? | Collection: runs into rivers, lakes and oceans, or soaks into the ground. The cycle repeats. |
Summary: The Sun heats water so it evaporates (and plants transpire). The vapour cools and condenses into clouds, then falls as precipitation and collects in water bodies and the ground, where the cycle starts again.
To revise, the student covers the right column and answers each question in the cue column from memory, then checks.
Cornell notes vs other note-taking methods
| Method | Best for | Built-in revision? |
|---|---|---|
| Cornell method | Lectures and chapters with clear main points | Yes: cue questions and summary |
| Outline method | Well-organised lessons with headings and subpoints | No, unless you add questions |
| Mind map | Seeing connections between ideas, brainstorming | Partly: redraw it from memory |
| Charting (table) method | Comparing several items on the same features | Partly: cover a column and recall it |
| Plain linear notes | Speed when you are just starting out | No |
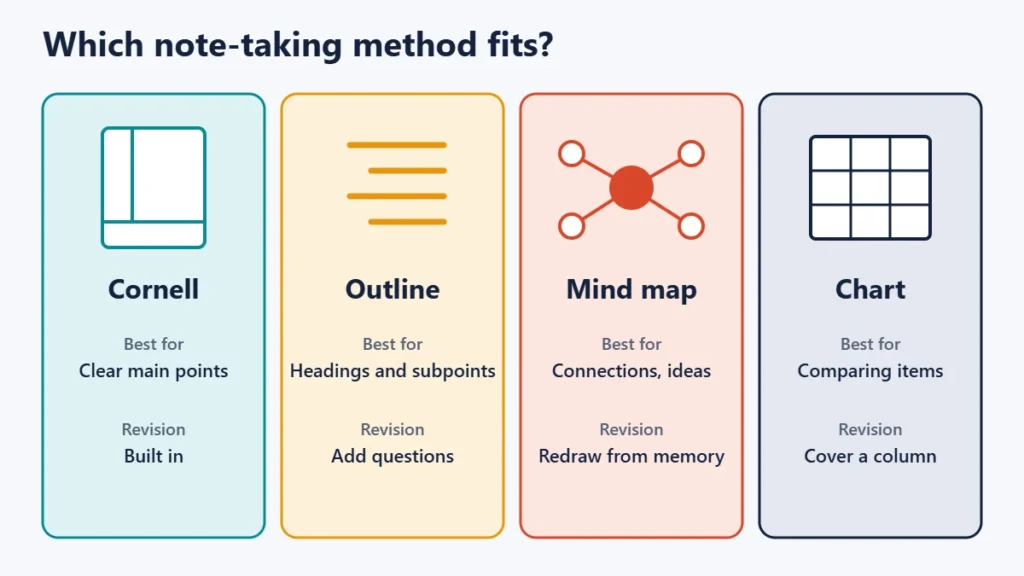
You do not have to choose only one. Many students write the notes area as an outline or include a small mind map, and still use the cue column and summary for revision.
Using Cornell notes for textbooks and videos
- Textbook chapters: read one section at a time, close the book, then write the main points in the notes area in your own words. Use the headings to create cue questions.
- Online lessons and videos: pause after each main point to write it down. Rewatch only the parts you could not explain when reciting.
- Maths and science problems: put a worked example in the notes area and write “Solve: …” with a similar problem in the cue column, so revision means solving, not just reading.
- Digital notes: a two-column table in any word processor or notes app works the same way. Add a summary box at the end.
Common mistakes to avoid
- Writing everything word for word. Copying the teacher’s every sentence leaves no time to think. Write key ideas in short phrases.
- Leaving the cue column empty. Without questions, Cornell notes are just notes with a wide margin. The cue column is where the learning happens.
- Writing statements instead of questions. “Evaporation” is a weaker cue than “What is evaporation and what causes it?” Questions push you to recall the answer.
- Skipping the summary. Summarising the page in your own words shows you whether you really understood it.
- Waiting too long to review. Fill the cue column the same day if you can, while the lesson is fresh, and review the page again over the next few days.
- Reading instead of reciting. Covering the notes and answering from memory is the whole point. Rereading the page is far weaker.
Try it: a 10-minute practice
Pick any section from a textbook you are using this week, around one page long.
- Draw the Cornell layout on a blank page (1 minute).
- Read the section, then write the main points in the notes area without copying sentences (5 minutes).
- Write one question in the cue column for each point (2 minutes).
- Cover the notes and answer the questions aloud, then write a two-sentence summary (2 minutes).
Repeat the recite step tomorrow and again in a few days. You will quickly see which points you know and which need more work.
Frequently asked questions
Why is it called the Cornell method?
It is named after Cornell University in the United States, where education professor Walter Pauk developed it.
Do I have to use the exact measurements?
No. The usual guide is a cue column about 6 cm wide and a summary space about 5 cm tall, but any layout with a clear cue column, notes area and summary works.
Can I use Cornell notes for every subject?
Yes. It suits subjects with facts and concepts, such as science, history and geography, very well. For maths, put worked examples in the notes area and practice problems in the cue column.
Should I take Cornell notes by hand or on a device?
Either can work. What matters most is that you write ideas in your own words, fill in the cue column and then test yourself. If a device distracts you, paper is the simpler choice.
How often should I review my Cornell notes?
Fill the cue column the same day, then review using the cue questions a day or two later and again about a week later. Reviews spread out over time work better than one long session before the exam.
Is the cue column the same as a margin for headings?
Not quite. Headings only label the notes. Cue questions ask you something, so you can use them to test yourself.
Conclusion
The Cornell method turns every page of notes into a ready-made revision tool. Record the main ideas during class, reduce them to questions afterwards, then cover the notes and recite. Add a short summary, and review the page a few times before your exam. Once the layout becomes a habit, you will spend less time rereading and more time actually learning.
Writing a clear summary is also a useful skill for essays. See our guides on how to write an essay and how to write a paragraph to practise it.